

How To Make Picture Animated In Photoshop
How to Cartoon Yourself in Photoshop
by Alexandra Bateman on Apr 18, 2022
With Photoshop, you can transform your photos with a whole host of artistic photo effects. In fact, you tin fifty-fifty use Photoshop to create cartoon images from your pictures. Do you want to brand a drawing out of your photo? Cartoon effects tin can come in handy for special events and projects. And cartoon portraits can actually brand great social media profile pictures to assist you build your personal brand!
In this article, nosotros will evidence you how to cartoon yourself in Photoshop. Simply first, make sure you have Photoshop downloaded on your device.
If you don't have it yet, you tin can become Photoshop from Adobe's site here.
Once you've downloaded Photoshop, you're fix to go! Let's expect at a couple of things before we brainstorm the tutorial, including:
- Types of Cartoon Effects in Photoshop
- Easiest Ways to Cartoon Yourself in Photoshop
- Steps to Cartooning Yourself in Photoshop
- All-time Tutorials for Cartooning Yourself in Photoshop
Types of Cartoon Effects in Photoshop
In Photoshop, there's rarely only ane way to achieve a particular issue. Cartoon effects are no different! The kickoff step to understanding which of Photoshop's tools to utilize for a cartoon effect is knowing what style you'd like your drawing portrait to accept.
Although we'll exist focusing on turning portrait images into cartoons in this tutorial, know that Photoshop's cartoon effect approaches work on other kinds of pictures, also. For example, you can use the same editing techniques to cartoon a film of a landscape that you can for a portrait.
Merely, what kinds of cartoon effects can you reach in Photoshop? Given Photoshop's extensive selection of tools, you can create both realistic and simplistic cartoon renderings of your portrait images.
Easiest Means to Cartoon Yourself in Photoshop
To create less detailed cartoon drawings of your portraits, you'll want to use Photoshop's Brush Tool, Layer Masks and a graphic tablet with a pen that gives you more command over tracing your prototype. In this arroyo, yous tin can utilize the tablet's pen and Photoshop's brushes to trace over your image. Of course, you lot'll want to use your brush on a new layer, or in a Layer Mask, so that y'all do non change the original image.
This approach is easy plenty to do if y'all have the proper equipment, namely a graphic tablet. If you don't, you can effort to complete this effect by hand using a mouse or trackpad. But, equally y'all may guess, keeping a steady manus for tracing is much more difficult without a stylus pen.
Y'all could also endeavour to cartoon photos in Photoshop using the program's Pen Tool. With the Pen Tool, you can create paths outlining the figure and its essential features, and and so utilize those paths to brand blocks of color. This approach, like the approach using the Brush Tool, allows you to exist as detailed or as sparse every bit you'd similar.
Depending on your prototype, the Pen Tool cartoon effect approach tin can be fourth dimension-consuming, particularly if y'all plan to create a detailed, realistic cartoon rendering.
Luckily, you can create the same realistic drawing rendering of your photo using filters built into Photoshop. If you're working without a graphic tablet or other tablet, this approach will be the easier of the two. And, you'll encounter shortly, the results are only equally impressive!
To create a more realistic cartoon of yourself in Photoshop, you'll need to utilise Photoshop'south filters, channels and adjustments. Let'southward take a expect at cartooning yourself in Photoshop in simply a few short steps.
Steps to Cartooning Yourself in Photoshop
First, open your portrait in Photoshop past either dragging your photo into the Photoshop workspace, or selecting File » Open up.
When you encounter your photograph in the Photoshop workspace window, go to Filter » Filter Gallery and select the Creative folder. So select the Poster Edges choice. This filter will heighten the edges of the portrait's face and body.
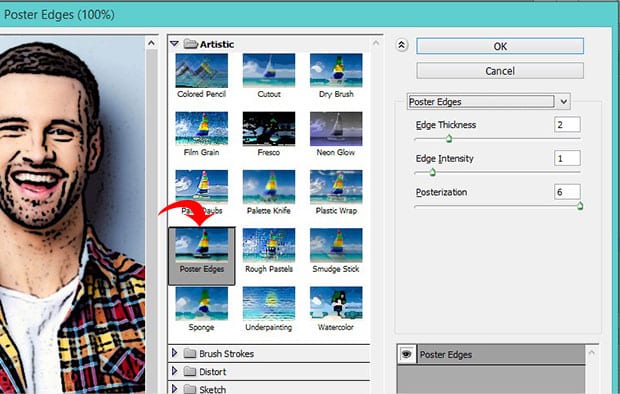
I'll employ the following settings for my photo:
- Edge Thickness: 2
- Edge Intensity: one
- Posterization: 6
Attempt these settings out on your paradigm, and so adjust them appropriately.
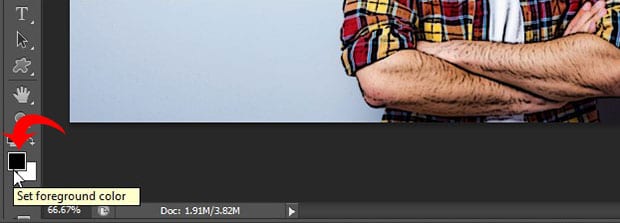
Before we move on to the next footstep, nosotros'll demand to set the foreground and groundwork colors to their default values — black and white, respectively. Become ahead and set those values if they aren't already:
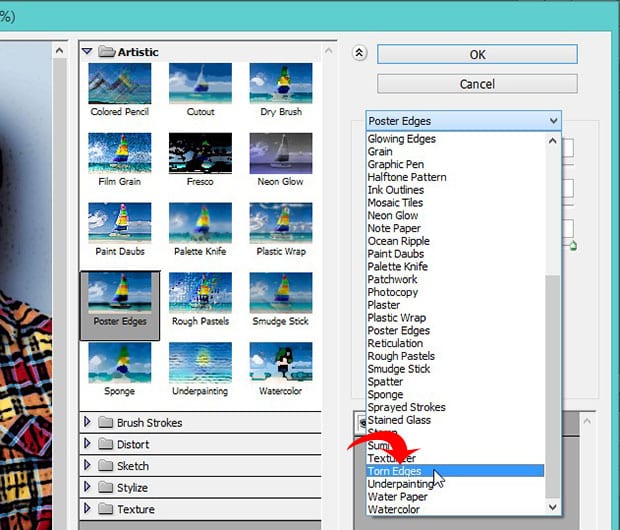
Next, go to Filter » Filter Gallery and select Torn Edges from the drop-down menu. This selection will add together some irregularity to the edges of the figure's shape in your image.
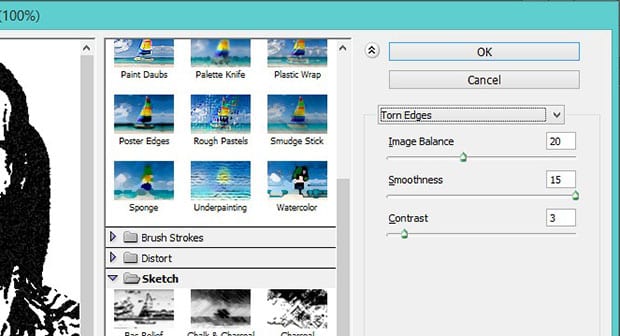
Here, I'll utilise the post-obit settings. Again, kickoff with these values and arrange for your image:
- Image Balance: twenty
- Smoothness: 15
- Contrast: iii
At present, select the entire epitome (Ctrl + A) and copy the choice (Ctrl + C).
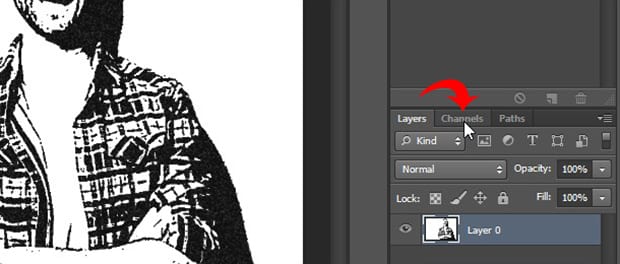
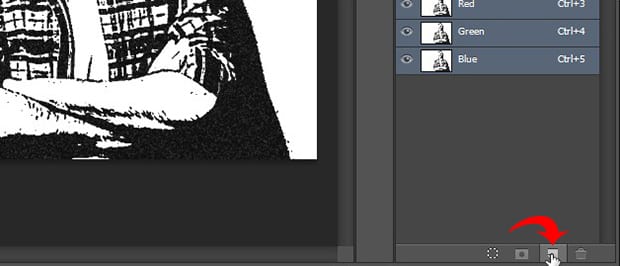
Side by side, locate the Channels Panel from the correct-side of your Photoshop screen, near your Layers Panel. Create a new aqueduct from the bottom right corner. Photoshop volition name this new channel Alpha 1 by default, though y'all're welcome to rename information technology if you lot like.
Paste your selection into the new aqueduct you simply created (Ctrl + Five). Now nosotros need to invert the image colors, which nosotros tin easily practise by selecting Image » Adjustments » Capsize.
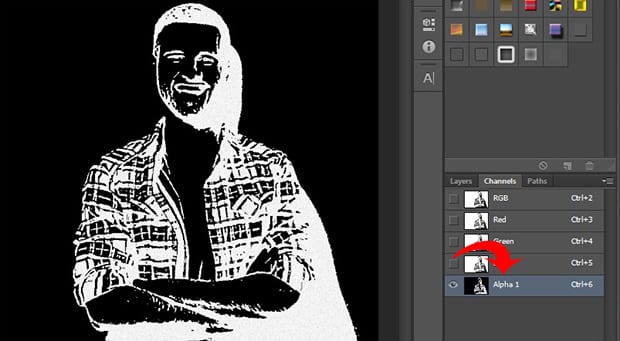
Next, Ctrl + Click on the thumbnail for the Blastoff 1 channel to select the white areas of the prototype.
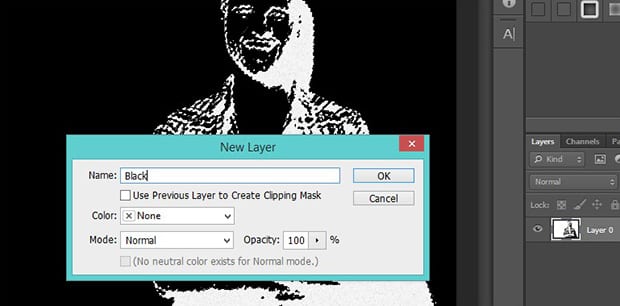
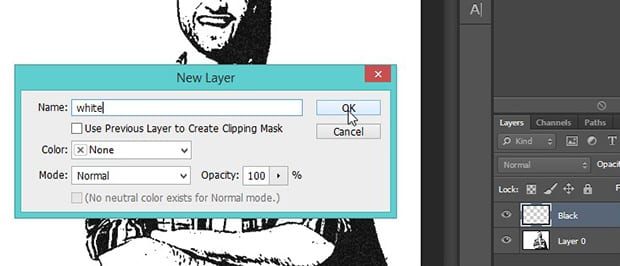
So, in the Layers panel, create a new layer by choosing the New Layer icon. Use the paint bucket tool (keyboard shortcut g) to fill the new layer in with black. I'll name this layer Blackness for simplicity'south sake.
And then add together another new layer and fill it with white. Once again, I'll name this new layer White. In creating these two solid layers, we've separated the black and white colors in our original epitome.
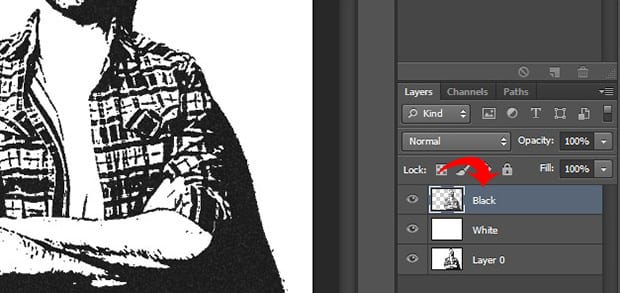
Next, elevate the Black layer to the summit of the Layers Console so that it sits to a higher place the White layer.
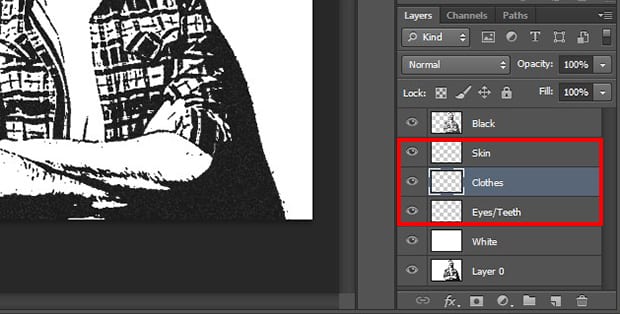
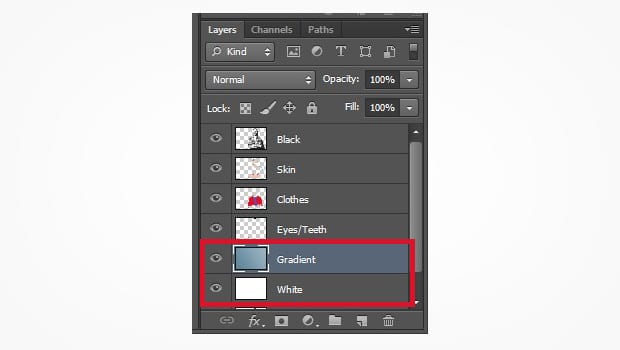
Now we demand to add 3 more layers to business firm the colors for our skin, clothes and eyes/teeth.
Simply create three new layers by selecting Layer » New » Layer, then name them Pare, Apparel and Eyes/Teeth accordingly. Elevate these 3 layers below the Blackness layer in the Layers Panel.
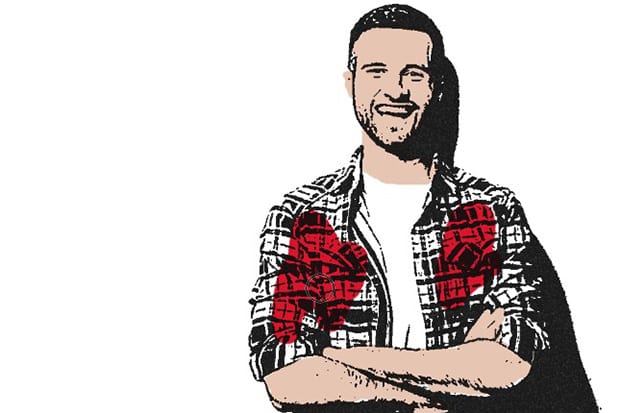
Next, decide what color you'd like the peel, dress and eyes and teeth in your photograph to be. For the photo in this tutorial, I've called the post-obit colors
- Pare: #e7c5b3
- Clothes: #d9142b & #425ad7
- Eyes/Teeth: #ffffff
To utilise the colors to the appropriate areas on the photo, select the Brush Tool from Photoshop'south left-hand toolbar. So select the particular layer y'all want to edit, and carefully brush over your image to apply color in that area.
Repeat this process for each layer until all parts of your photo are colored in how you like.
Here'due south what our final cartoon portrait looks like:
Now, lets create a gradient background to brand the drawing really popular!
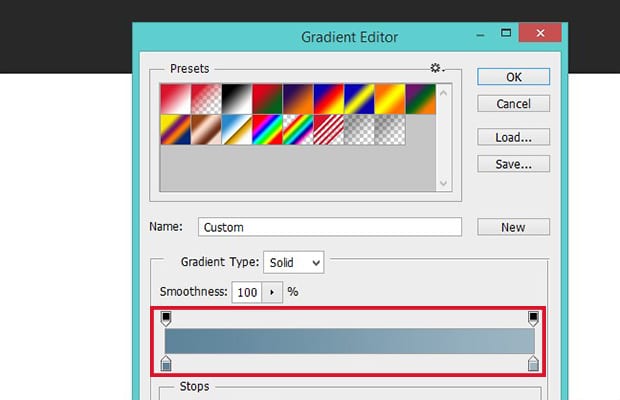
We'll create another layer and name it Slope, so select the Gradient Tool from the toolbar.
Observe the continuous gradient bar that appears within the Gradient Editor. Choose the boxes at either cease of the gradient by double-clicking them, and then specify your colors.
I'm going to create a blue-gray gradient with the colors #5d849a and #9cb5c3. Click OK afterward you've set your colors.
To fill the gradient, click and agree the mouse starting at the lesser-left of the prototype, and elevate the mouse to the top-right of the epitome. Then release the mouse. Drag and driblet this Slope layer directly higher up the White layer in the Layers Panel.
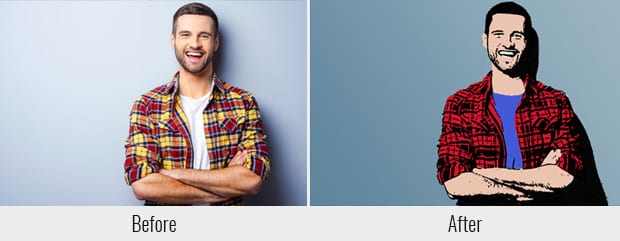
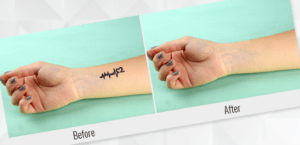
Now you're washed! You lot've created a drawing of yourself in Photoshop, consummate with a professional person gradient groundwork. Check out this before and afterwards prototype of our cartoon effect edit below:
As we mentioned earlier, experience gratis to adjust the settings on the Poster Edges and Torn Edges filters to suit your epitome. However, make sure to follow the steps outlined in this tutorial sequentially. The lodge of the layers in the Layers Panel is important!
Best Tutorial for Cartooning Yourself in Photoshop
The internet is a great resource for finding tutorials on cartooning yourself in Photoshop! Video tutorials on gratis sites like YouTube testify multiple ways to achieve cartoon furnishings in a number of different styles.
Keep in mind that many other types of cartoon effects will require more than extensive utilize of the brush tool and thus exist more well-suited for work on a graphic or other tablet.
If you find yourself needing to utilise cartoon furnishings to images oft, consider investing in a tablet and stylus. They will make your life easier and open upwardly a diversity of other drawing issue styles for y'all to try.
As e'er, the all-time results come from do. Don't spend too long reading or watching tutorials. Instead, do the technique yourself. You can even experiment with some of Photoshop's other fun filters to encounter what kinds of unique effects you can create.
Cartoon Yourself!
Nosotros promise this commodity has helped y'all to acquire how to cartoon yourself in Photoshop. If you found this Photoshop tutorial helpful, check out our other Photoshop tutorials, including our guide on how to add a HDR effect to your images in Photoshop.
If y'all're looking to create amazing galleries and help speed up your WordPress website, y'all should get Envira Gallery here and create your first gallery.
Be sure to opt in to our newsletter on the right and follow us on Facebook and Twitter for more costless photograph editing tutorials, photography tips and WordPress how-to'due south.
Using WordPress and want to get Envira Gallery free?
Envira Gallery helps photographers create beautiful photo and video galleries in just a few clicks then that they can showcase and sell their work.
Related Posts


Source: https://enviragallery.com/how-to-cartoon-yourself-in-photoshop/
Posted by: joneshany1989.blogspot.com
0 Response to "How To Make Picture Animated In Photoshop"
Post a Comment